DIY Matte Boards

Thursday, August 18, 2011

Hi friends. Hope everyone has had a wonderful week so far. It's blowing my mind that it's already Thursday--things have been super crazy around here!

I recently purchased these amazing vintage botanical prints from Ebay with the hopes of framing and hanging them in our bedroom. I was pretty happy to buy all of the frames at Michael's with a 50% off coupon and quickly began my quest for the perfect matte boards. That search came to a screeching halt however when I realized that the prints sizes were 6.75"x9". Apparently, you can't buy pre-made matte boards in that particular size. Annoying. On top of that, I found out that custom-made matte boards from good old Hobby Lobby were $20. Each. Also annoying.

Since I'm seriously cheap, I set out to find a way to make custom matte boards on my own. After briefly considering white card stock, I decided that I wanted to use something a bit more substantial. And then I came across the one and only Foam Sheet. Fifty cents at Hobby Lobby. Holla!

Here is the final product:


Now, this isn't rocket science, but I figured I would fill you all in on a much more affordable way to make a custom matte board if the need arises.

First, go to your local craft store and grab a few large foam sheets.


Next, grab your husband and have him first measure the size of your frame (and cut the foam sheet accordingly), and then measure the size of the print (and again, cut accordingly). Take lots of pictures and make him mad.


Assemble everything like you normally would and then....watch out! Prepare to be amazed at how great your masterpiece looks.


Just the right amount of depth and texture. I honestly can't tell that my "custom matte boards" are really foam sheets. Can you?


Don't forget to enter the UPrinting.com Giveaway! Last day, friends. Get it while you can.

P.S. I'll probably link this post to a couple of link parties which can be found HERE. Check them out!

Adios!!

DIY Creative Floral Arrangements: Part Two

Monday, August 15, 2011

Hello everyone! Hope you all are having an awesome Tuesday. Today, I will be sharing another post in my series on how to do your own floral arrangements on a budget. Thank you so much for your compliments on the arrangement from last week; I hope you went and tried it out yourself!

Here is what I will show you how to make today:

Cute, huh? As I've mentioned before, my goal for this series was to create arrangements with items that most people already have in their homes. And who doesn't have a few pretty bowl lying around? I hope no one. We use our bowls on a daily basis. I have to have my cereal, yo. Breakfast, lunch, and dinner.

Anyway...here are the steps to make it on your own:

STEP ONE: Use some of your leftover flowers and plant food from last week's arrangement. I actually just plucked a few stems from the huge antique hydrangea I bought. Find some cute bowls or teacups. I used four, but feel free to use however many your little heart desires. Optional: Grab a bit of Spanish moss for a little extra something. I bought a huge bag of this stuff at Hobby Lobby while it was 50% off....I think it was around $2, but it was mainly used for our Mini Patio Project last May.


STEP TWO: Begin stacking your bowls by putting a little bit of Spanish moss in between each bowl. You just need enough to make it hang over the edges. I made sure to tilt my bowls as I stacked them to add a fun touch.


See? Fun touch.


STEP THREE: Fill your top bowl that will hold your flower stems halfway with water. Make sure to put in plant food. Trim the stems so that the flowers rest on the edge of the bowl. (My bad, no pictures of this step...but it's pretty easy.)

STEP FOUR: Place the arrangement on the top of the other bowls.


STEP FIVE: Adjust the bowls and flowers to your liking. You're done! Enjoy.

And here's where mine ended up in my house:


In the first step, I mentioned that the Spanish moss was optional. The reason for this is because it really looks just as cute without it, so if you don't feel like running out to buy any moss, don't worry about it!

See what I mean?


Very simple, very easy, and most of all, very affordable. Now that's what I like.


 I hope you all enjoy trying this arrangement out. Come back next week for another DIY Floral Arrangement!

P.S. Be sure to enter the giveaway from UPrinting.com....you don't want to miss it!

Double P.S. I'll probably link this post to a couple of link parties which can be found HERE. Check them out!

Sunday Giveaway: 100 Postcards from UPrinting.com!

Saturday, August 13, 2011


I hope everyone is having a wonderful weekend. So, big news:  I am very happy to announce the first-ever giveaway here on Twenty Three Oh One!

UPrinting.com will be giving away 100 postcards to one lucky reader! I don't know about you, but if I had a wedding/birthday/anniversary/another random party to plan....I would be all over this. These would also come in quite handy for birth announcements, moving announcements, or if you really want to plan ahead: holiday cards (come on, Christmas!). And don't forget about small businesses. These are the perfect way to advertise your shop, company, or event to whomever you want.

Need help designing your postcard? They can help you. Want to upload your own design? UPrinting can do that, too. Want more information? Click on the links below to find out all about postcards from UPrinting:

Postcard Printing
Postcard Size
Postcard Design 

Here are a few other details of this giveaway:

-100, 5"x7" postcards
-14pt Cardstock Gloss
-No folding
-Front only printing
-2 day business turnaround time
-Restrictions: Limited to U.S. residents 18 years and above only

For a chance to win this giveaway, simply leave a comment below explaining what you would do with your 100 postcards! Giveaway is open until Thursday, August 18th, at 11:59 p.m. One entry per reader, please! Winner will be selected randomly through random.org.

Check back on Friday, August 19th, to see if you won!

Disclaimer: This giveaway is sponsored by UPrinting, an online printing company. No monetary compensation was given and I will recieve postcards for hosting. See more information about available postcard size and design on UPrinting.com.

Recipe: Grilled PB & Cinnamon Apple Sandwich

Wednesday, August 10, 2011


Alright, this sounds weird, but it's de-lish. Promise. And purely a product of my late-night "I can't sleep" imagination.

Here we go:

Ingredients:

-2 slices of bread (I used whole wheat from the bakery...the fancy stuff)
-peanut butter (crunchy or creamy works, I used a little of both)
-1/2 apple, cut into slices (I used a Gala apple, but I actually think Granny Smith would taste even better)
-1 TBSP honey
-Cinnamon to taste (I probably used about 1 TSP)

Directions:

Spread peanut butter on a piece of bread. Slice apples and place them on top of peanut butter. Drizzle honey over apples. Add cinnamon.


(This is mine pre-cinnamon)

Place other slice of bread on top (duh). Grill each side on a skillet or grill pan at medium heat until bread is golden brown. Serve and enjoy.


If apples aren't your thing, I can promise you that bananas would be the perfect substitute. This knowledge is completely due to my obsession with peaunut butter/banana/cinnamon sandwiches. Yummmm.

Have a great day!

P.S. Chances are, I'm linking this post to a couple of link parties which can be found HERE. Check them out!

DIY Creative Floral Arrangements: Part One

Monday, August 8, 2011

Hello, blog friends! Today is the first post of a five week series on how to create your own fresh floral arrangements...on a budget. Using a little creativity, you can make stylish, unique, and modern arrangements with grocery store flowers and items you already have around your home...and I'm going to attempt to tell you how! (Yes, I do realize that I just sounded like an infomercial....it must have been all those advertising classes in college....)

I chose to share this with you all because it's something that makes me so happy, and I really believe that fresh flowers are one of the most important elements to making your house feel like a home. I chose to get creative and only use items I had around my house to make these floral arrangements. There really is no need (in my opinion) to spend a ton on something that will only last a week or two. I also only purchased flowers that can be found at most grocery stores and super markets. First up is this little beauty:


And here are the steps on how to make it yourself!

STEP ONE: Go to your local grocery store and purchase a few of your favorite flowers. I would recommend getting a large hydrangea for this arrangement. The antique hydrangea I purchased for this project is one of my favorites because it so huge and only costs $6. The other "filler" flowers that I bought are hypericum berries and craspedia, but really you can get whatever you like. I didn't use the violet flowers for this project...I'm saving those for next week :).


STEP 2: Take all of the flowers out of their packaging and place them in a large container of water. If you're going to leave them there for a while, make sure to trim all of the stems about 1 inch with good scissors or floral shears. Save the plant food, you will need it!


The other items you will need for this arrangement are: A clear glass vase (round or square), and a smaller vase that can fit inside the previously mentioned vase (or you can just use a cup or drinking glass, that's what I did). The smaller vase or glass will need to be filled halfway with water.


STEP THREE: Place the smaller vase in the center of the larger vase. Take some sort of "filler" material and begin placing it between the smaller and larger vase. Fill it so that the smaller vase can't move or tip over. I used spanish moss for this because I had some leftover from my patio project, but feel free to use anything you want or have like coffee beans, rice, sand, pebbles, lemon slices, lime slices....you name it, you can use it.


Make sure to pack the spaces between your two vases really tight with whatever filler you choose to use.


Your vase should look something like this when its finished.


STEP FOUR: Pour the plant food into the water of the smaller vase.


STEP FIVE: Pull off any leaves on the flowers that you don't need in the arrangement.


STEP FIVE: Cut the first and most substantial flower you will be using (in my case, the hydrangea) to the same height as the vase. Place the stem (or stems) in the smaller vase. If you are using a hydrangea, you could technically stop at this step because it already looks pretty, but we'll keep going just for fun :).


STEP SIX: Take your "filler" flowers and trim them to a height that's a little taller than the first flower.


STEP SEVEN: Began placing the filler flowers around the arrangement. I like to make a sort of jagged spiral with mine, just to make sure they are all spread evenly. Start by making a circle around the edge of the arrangement, and then keep spiraling your way to the center. Feel free to play around with it, you will know what looks best!


STEP EIGHT: You're finished! Once you have all of your flowers in place, you should have something that resembles the picture below. Make sure to trim off any overhanging flowers and stems, as well as those that are too tall and are sticking out of the arrangement.


Now comes the fun....find a place for it around your home!


I L-O-V-E this little guy. I want him to live forever.


You can even have some more fun with this arrangement and stick it in a fun basket, like this:


Lovely. This is quite possibly one of my favorite arrangements I've ever made and it only took about 10 minutes and $10. The possibilities and combinations are truly endless.

Have fun and make sure to check back next Tuesday for another chic and cheap fresh floral arrangement!

P.S. Chances are, I'm linking this post to a couple of link parties which can be found HERE. Check them out!

Recipe: Lemon Cake Cookies

Friday, August 5, 2011


I have always loved anything lemon flavored. These little guys remind me of my days at Vacation Bible School (a.k.a the best place on earth for a kid), when we were spoiled at snack time with watered-down pink lemonade, fruit punch, iced oatmeal cookies, and the one and only: iced lemon cookies. All off-brand of course. Unfortunately, these little bites of heaven aren't sold anywhere nowadays (I've looked....a lot), so when I heard of this recipe, I just had to try it.

I had to tweak it a little because they just weren't lemon-y enough for me. Here's my version:

Ingredients:

-1 box of lemon flavored cake mix
-1 egg
-1 tub of Cool Whip
-1 TSP of lemon extract (this is optional)
-1/2 cup powdered sugar

Preheat the oven to 350 degrees. Beat the cake mix, egg, Cool Whip, and lemon extract until mixed. Dough should be sticky and thick. Lay parchment or wax paper on baking sheet. Roll tablespoon sized pieces of dough in a bowl of powdered sugar, until they are no longer sticky and form a little ball. Place on baking sheet. Bake 9-12 minutes. Eat. All of them.


I need more recipes. Anyone heard of any good ones lately?

P.S. I have just updated my reading lists and "Featured" button on the blog. Check it out!

P.S. Chances are, I'm linking this post to a couple of link parties which can be found HERE. Check them out!

Our Master Bedroom

Monday, August 1, 2011

Hello all. First I want to thank you all for your sweet comments yesterday. They were very encouraging and really helped me get over my feeling idiotic for taking pictures of myself. Seriously, thanks!

Exciting post today. I have finally finished and photographed our bedroom transformation. This has been a long time coming, but I'm so happy to say that it feels pretty complete. There are a few other extra projects that I may do in this room, but for now, it's "done".

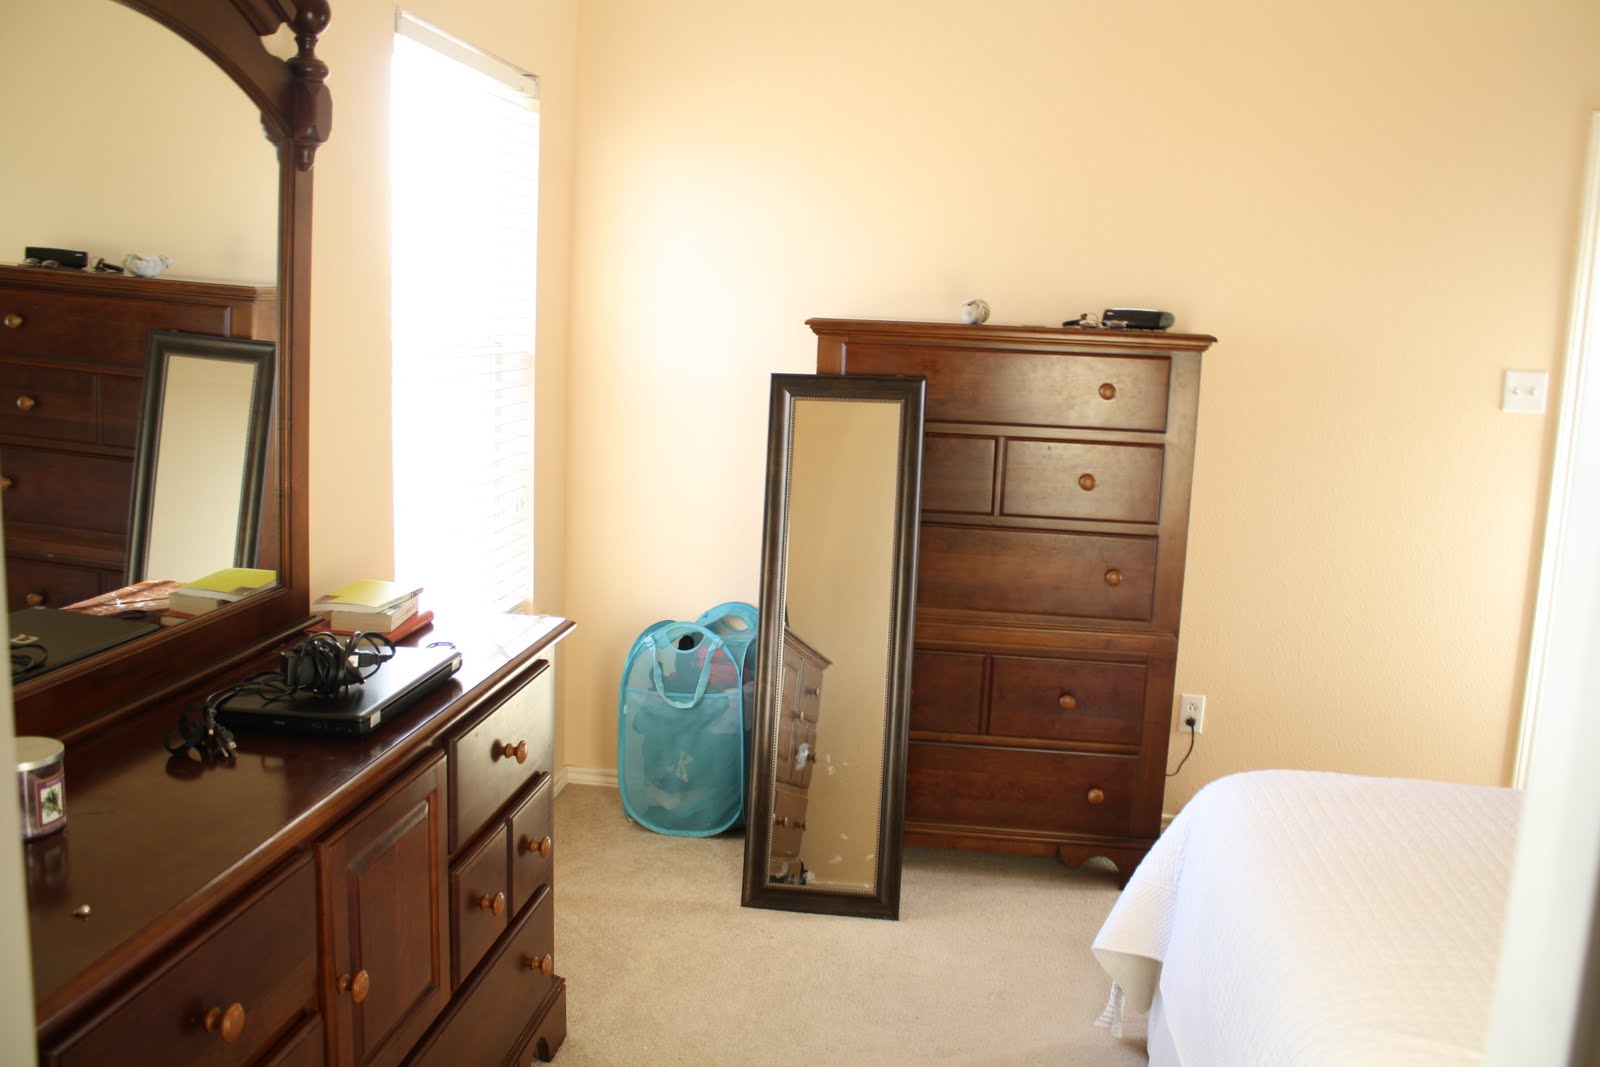
You may remember the "Before":


And here is the "After":


($5 if you can spot lazy Louie)


The frame above our bed is from Savers. Yes. It was $6.99. When I picked it up, I thought, "Am I really going to buy this for my home? Seriously?"....Yep, I did. And I love it!

We had a very large amount of unused mirrors sitting in our storage room. I don't know what my deal is, but when I don't know what to buy, I always resort to wall mirrors. Any way, I tried to use a couple of them by stacking them on our dresser. Love, love.


Our lovely duvet cover and shams are from the "Sienna Paisley" bedding collection at Pottery Barn. EBay, baby. Half the price.

The velvet euro shams are from Target. I'm kind of obsessed with them.


I'm so proud of myself because I managed to make this bed skirt! Tutorial to come. Total cost: $14.


I got the lamp on super sale at TJ's. $18. There's a dent on the back of the shade..."So what?" is what I say to that.


Ah, these stools. I'd been looking for cute garden stools for several months, and then I came across these beauties at World Market. On sale. Sold!


Our child. Our very bored child.


The wall color is "Bay Sands" by Valspar. It's a shade lighter than the color in our bathroom. We don't have room for bedside tables (our door is the to right of the bed and almost touches it when it's open), so the lamp will eventually move to our guest room to make way for wall sconces. I love me some good wall sconces!


So that's the room. I feel like we did a lot with such a small space. I'm hoping to add some wall art to the wall that's on the left side of bed, but until then, we are fin-ished.

Hope that I'm not the only one who loves it! Have a great, great day.

P.S. 30 for 30 will return tomorrow!


Double P.S. Chances are, I'm linking this post to a couple of link parties which can be found HERE. Check them out!