DIY Faux Marble End Table

Tuesday, June 17, 2014


Guys, I loved doing this project! It's definitely one of my favorite DIY's that I've ever done and I'm excited to share.

I've been seeing a lot of marble and gold legs on end tables and coffee tables that look so chic and can still be mixed in with every day casual decor. Here are a few of my favorites...


And here is my version...


Woo-hoo!

Of course, end tables were about the last thing on my long list of things to buy for the house, but I was walking through Ross and came across this great little end table for $40 that had the wiry gold frame that everyone is getting these days. It was sturdy, but had a plain black top that was covered in scratches.


(I promise the scratches are there ;) Also ignore our crooked knobs, I've been meaning to tighten the right door.)

I didn't want something so stark so I thought that this would be the perfect opportunity to attempt a faux marble on the top. I figured that in the worse case scenario, it would look awful and I could just spray paint it black again. Plus, the table was like half the price of others I've seen even at Target and World Market so it seemed like a no-brainer to at least try.

I followed this tutorial very loosely, but it is for countertops. I decided to go for the honed marble look instead of polished, so I didn't do a glaze on top or anything like that. 

Here are the supplies I used:

-Primer (a no-sand one)
-White paint (I just used our leftover cabinet paint--satin)
-Foam roller
-About 1/8 cup of three different shades of gray paint. Again, I just mixed our leftover cabinet paint with some leftover black paint in different variations and put the different shades in disposable cups. I also added a bit of leftover green paint to one of the mixtures to add more interest.
-A lot of crinkled up plastic grocery bags
-Damp rag (key player)
-Very small short-bristled paintbrush (like cheap-o watercolor)
-Fine grit sandpaper

I had all of this on hand, so the total project was $40 just for the cost of the table.

I had to put about 5 coats of primer down and two coats of white paint to cover all of the black. Once that was dry, I put some of the lightest gray paint on my scrunched up grocery bag and began sponging it very lightly on the table top. At first, it looked awful....BUT the damp rag is key in this project--after each sponging round I would go back and sponge with the damp rag and even "wash" the table very lightly with it to smooth everything out.

After I did the lightest gray, I moved on to the medium gray using the same method. I went back over the really patchy areas by sponging and ragging with white paint. Here is what it looked like after about 5 coats of sponging/ragging:


Not too bad! I think I added more white after this photo, before I added the veins.

The veining was the hardest part. Bryan said I had "crazy eyes" while I was doing this step. Truth. I was having flashbacks of every art class I took in high school and college and the imaginary teacher was scolding me for "painting what I think I see, and not what's really there". Maddening, I tell you.

The key to the veining step is to feather with the brush instead of just painting a line (basically smoosh the bristles down in all different directions and make tiny zig zag movements). You barely need any paint for this part. I used the darkest gray for the veins and really should have taken an action picture, but I forgot amidst my crazy-eyed daze. Here is what it looked like when I was done feathering and had let everything dry:


It's not completely perfect, but I'm just so happy with how it turned out that I can't stop looking at it! Those are the  best kinds of projects. :) Of course, in true Katy fashion, I still have not sanded out the last few bumps, but maybe one of these days I will. Maybe.


I styled it really quickly and love it even more! I want to put this in our living room but unfortunately we are getting ready for a garage sale so the living room looks more like a storage unit than anything else, which all bloggers know is no good for photos, so for now it's sitting by itself in our bedroom.


The best part of this project is that it boosted my confidence enough to do faux soapstone counters in our kitchen. (Basically the same method but in black and you finish it off with paste wax.) Yep. I'm excited! 

So there you have it! Now go grab something from a thrift store and turn it into marble!

21 Weeks.

Sunday, June 15, 2014


I realize that I am teetering on the edge of 22 weeks (my switch days are Wednesdays), but I am bound and determined to do this every week, gosh darn it!

How Far Along: 21 Weeks.
Baby Size: Gosh I don't even know. More than 12 ounces, maybe up to a pound! Carrot length.
Total Weight Gain: ah, 15 lbs
Maternity Clothes? Needing more. It is hot and I only have a handful of shorts that are stretchy. Summer pregnancies are a bit more interesting to dress than winter pregnancies. 
Stretch Marks? No.
Sleep: Okay, I have never experienced restless leg syndrome before but have been right before I fall asleep for the last week or two. It is awful. I had no clue it was pregnancy related, but I was reading another blog (Chris loves Julia) and she complained about it during her pregnancy and so I googled it and sure enough! Just another part of pregnancy bliss ;). This pregnancy is so different from Parker's...it's weird. Also more leg cramps. I guess I need more bananas? 
Best moment this week: Feeling a lot more outside kicks! Seeing him move and giving "him" a name! Hayes Benjamin Roberts. :) Also, Parker is actually acknowledging that there is a baby in my tummy! 
I get up to pee about: Once a night  
Food Cravings: Um I've been to McDonald's like 3 times in the last week. I do not go to McDonald's...like ever. 
Labor Signs: Nope.
Belly button in or out? In
Wedding rings on or off? On
Happy or Moody most of the time: Pretty happy. Starting to get overwhelmed with everything that needs to be done before he gets here!
Looking forward to: We had to reschedule our appointment with our doula (she had a client go into labor--good excuse), so we will be meeting this week!


The Plan For Parker's Bedroom.

Thursday, June 12, 2014

I am SO excited for this room! I don't know why, maybe it's that I'm adding color to the house, but I can't stop thinking about it. 


Allow me to talk through this...it will take a while. :)


Here are the things that Parker loves that will be somewhere in the room: Planes, trains, cars, trucks, ABC's, and books.

For the the basics of the room, I'm sticking with my usuals...bamboo blinds, some kind of natural flooring (hopefully new carpet if I can save enough this year!), and probably a light color on the walls. I was thinking of stripes (still like that trend), and I put a gray paint on here, but it may be more of a beige or closer to white. Oh, and I would love to build sliding barn doors for the closet. It is a really wide double-door that always gets stuck so it would fix that and look great, too.

For furniture, I scored some awesome deals on Craigslist--two twin headboards (P and baby will share this room eventually), a nightstand, and an amazingly under-priced dresser. I will paint the headboards and nightstand but the dresser is a truly beautiful knotted oak and I'm just going to switch the hardware out on (I'm thinking brass or bronze cup pulls). I am a little worried about fitting both beds in the room that we are planning to use...it will definitely be tight. Part of me is considering bunk beds but I don't like how bunk beds close up a room visually....I don't know yet. The headboards were only $25 together so I won't feel too bad if I go a different direction with that.

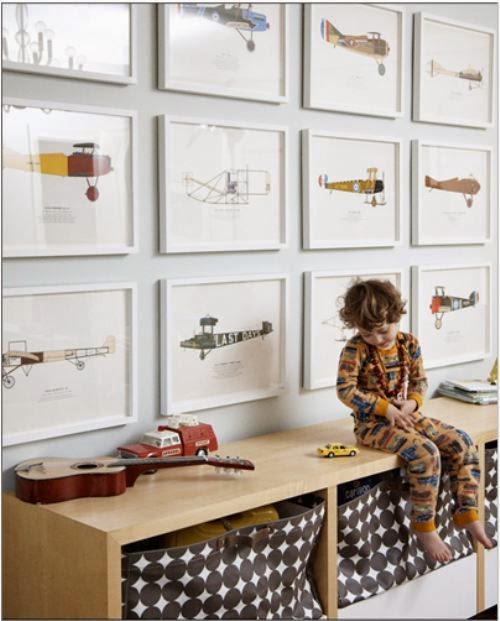
For decor, I'm thinking a book wall would be cheap, colorful, and useful. We will still have a playroom so these are the only "toys" that will be displayed. This kid could read all day, so I think he will like it. We also have some vintage airplanes prints that were passed down to Bryan from his grandpa that I plan on using. Excited for that! I like the idea of using a flag and maybe some cute graphic prints with quotes or verses on them if we can make them fit.

For fabrics and bedding, I'm sticking with red and navy, and I might throw some light blue in there with sheets or something. I love the idea of gingham on a simple bedskirt. I also saw a really cool linen-look map fabric that I may use for curtains.  For a pop of color (to tie in the book wall colors), I want to get a couple of those ABC pillows. (Etsy) OH, and I saw the army blanket idea on Sarah's House like 6 years ago and promised myself I would use it if I ever had a boy.

Here are some of my main inspiration pictures. All of them can be found on this board on Pinterest. A lot of them are really designer-ish, so our room would look more livable, but I love the overall looks...


I think that's everything in a nutshell. :) Once I finally make up my mind about the bed situation we can get to work on the room! Any suggestions? It's a weird room set-up so a bunk bed would either go right by the window, or right next to the closet...what do you think of bunk beds vs. twin beds?


Here's Our Laundry Room...

Sunday, June 8, 2014

Hello! I am finally getting around to posting an actual room in our "new" house. This is a big day! I have to admit that a major reason that this hasn't happened yet it simply because I hate going through photos and figuring out which ones to use. ;)

We finished the laundry room in January (I know) and I LOVE it. It is seriously the only room in the house that is 100% remodeled to the style that we want everything else to look like someday too.

I really needed it to be pretty but really functional. I wanted to make sure that every single thing in there had a reason for being in there and was easy to get to, so that played a huge role in decorating.  I talked a lot about the inspiration for everything in this post and this post.


Ta-da! Hope you like it as much as I do. :) We tried to skimp on cost as much as possible because 1) we are low on funds, and 2) I like a good deal as much as the next girl. Thankfully I have a live-in handyman and I'm not too shabby with a paint sprayer either so we make it work.


Bryan is really the all-star here because he tiled the floors (this tile) and built all of the craftsman style casings for the doors. He also installed the 5.5" baseboards that look so luxurious to me! I love them. Oh, and he nailed up the paneled ceiling to hide all of the popcorn. I love that man. And we got through this makeover with next to no fights ;).


I used my favorite Home Right sprayer to paint all of the trim, casings, and ceiling. It only took a few minutes after we tarped off the room from the rest of the house. (that's the beauty of re-doing a small room) The walls are BM Early Morning Mist, the trim is BM Paper Mache, and the doors are Valspar Lincoln Cabin Black.


Now, we don't have a window in this room, but I like pictures with natural light because they show the true colors of everything...so for the above photos, the door was open to the garage. BUT, I will share what the room looks like with it closed even though it's not as pretty in pictures :).


I'm not quite sure why it looks greener in these photos? The walls are more greige in real life. We changed out the light to a "natural light" bulb to get rid of the usual yellow tungsten tone--it made such a difference in the feel of the room! We also replaced the light with this schoolhouse one.


I saved on cost by using some leftover shelving that we had from Ikea. They are painted in BM Carolina Gull. The shelves are super handy and functional.  Things are separated in the large baskets like this: candles, small tools that we need frequently, extra light bulbs, lonely socks, shoe cleaners/polishes, and all of the tapes (duct, masking, etc.). It has really helped to corral things and stays organized easily which is nice. There are still a few little baskets and drawers that are empty, too...still trying to figure out what would work in those. 

On top of the dryer, I made a little washing station where our laundry detergent and dryer sheets are kept. I really love this set-up. I always fold laundry in front of the TV and I never need the top of the dryer for anything else, so this works great and looks pretty. 


 (There's the door to the garage.)


Our laundry room tends to be the place where we pile all our bags, jackets, scarves, and shopping bags since it's the first place we come in to from the garage. I got these little numbered hooks at Paul Michael a couple of years ago and finally put them to good use for all of that! I made it prettier for the photo, but normally Parker's Skip Hop backpack is hanging there as well as more than a few Target and TJ Maxx bags that I'm always meaning to return :). I printed the fruit prints from the Graphics Fairy for free. They look super nice in real life and add a lot of color to the room. 

I also seriously consider our cleaning closet a huge blessing in our house. The main reason that I was able to do open shelving was because I could hide everything else behind the closet door. I keep our ironing board, iron, other detergents, stain fighters, batteries, hooks, brooms, mops, paper towels, diapers, and all of our cleaning supplies in there. It's awesome. I guess I should have taken pictures---one day maybe!


So... that's all I've got. I think the only things I still have to do in here are order this laundry print and add an industrial looking bar to hang clothes on the small blank wall next to the garage. (I rarely hang clothes to dry though, which is why I haven't done that last part yet.)


Maybe if I could decorate/organize the rest of my house to this scale it wouldn't be in a constant state of mess? Kidding, kind of.  ;) We will get there. Have a great weekend!


20 Weeks!

Saturday, June 7, 2014


How Far Along: 20 weeks. Halfway!
Baby Size: 12 ounces according to sonogram--banana!
Total Weight Gain: ah, 15 pounds. I eat too much. :) I'm holding out hope due to the fact that this also happened with Parker.
Maternity Clothes? Same as it has been.
Stretch Marks? No.
Sleep: Leg cramps! In the middle of the night! Already! What is this? Bleck.
Best moment this week: Seeing a healthy baby boy at our anatomy scan. Everything looked great which we are thankful for! Getting to see his little face and hands in 3D. :)  
I Am Most Comfortable Sleeping:  On my side-ish...I still try and roll to my stomach but that obviously doesn't work.
I get up to pee about: Once a night  
Movement: He moved on the outside! So weird and the best feeling ever. I've seen several kicks and even rolls. Bryan felt him for the first time this week too.
Food Cravings: Watermelon. Soup from La Madeleine!
Gender: BOY!!!!
Labor Signs: Nope.
Belly button in or out? In
Wedding rings on or off? On
Happy or Moody most of the time: Happy.
Looking forward to: Decorating the nursery...again. Watching my belly grow. I have an obsession with pregnant bellies. Also, Parker has really taken an interest in my belly. He will kiss it now (when he feels like it) which is cute!