Pages

Friday, August 30, 2013

Favorites from August

There is so much inspiration and good information available through Pinterest and blogs these days, so I thought I would share a few of my favorites I've seen around the web in August.


1// I am so inspired by this oversized art print and found it on with this new-to-me website.
2// If I had a little girl in school, she would be getting this backpack. You can flip it back and forth for a new look! So sweet.
3// And once Parker is in school, I will seriously "encourage" him to want this superhero backpack, complete with a cape!


4// Ready or not, Christmas will be here before we know it (!), and I've already got my eye on this free printable that looks like Santa's personal stationery.
5// This no-sew pleated curtain tutorial is seriously genius. I love easy projects like this that look high-style.
6// Need a place to put your iPhone while you run? I do. This DIY running belt is cute and looks pretty simple.
7// Dollar-store table cloths turned into a streamer backdrop? And I've found the decor for Parker's 2nd birthday party! Thank you very much. 


8// Ever wondered how to set a formal place setting? Here you go. Cute blog, too!


Have an amazing weekend!

-----------------------------------------------------

Want to see all of the things that inspire me most?

Wednesday, August 28, 2013

Organized Home: Mail Sorting Center

One of my biggest organizational issues has always been where in the heck I should put the never ending amount of mail and paper that makes its way into our home. 

In our last house, I had two veeeeeery messy magazine files that were stuffed with every paper under the sun. We never knew where anything was which made doing taxes, making plans, and remembering important bills and dates pretty tricky. 

And then something clicked. (Hallelujah!)


I needed a simple but efficient way to file and categorize every piece of paper that came into the house. Sure, we have "The Big File Cabinet" that holds ALL of our important and long-term files and information, but I needed a temporary place to sort things that was out in the open and easy to get to. And it needed to be pretty :)

And then...I was in Target and noticed the cutest little file holder. It was meant to be. I snatched it up, took it home, and after a few hours of walking around in circles trying to figure out what kind of mail and other papers we receive and think are important enough to keep, I grabbed my label maker and came up with this...


Here are the categories in detail...

-Auto - Car insurance, invoices, repairs, registration notices, etc.
-Cards/Invites - Invitations from past events that I want to scrapbook, sweet cards to save, notes, etc. Invites for upcoming events are displayed somewhere else that I hope to show you soon!
-Financial - Banking and financial information, paid bills, statements, etc.
-Health - Anything related to health/eye/dental insurance, paid medical bills, invoices, etc.
-Home - Mortgage and home insurance information or statements, etc.
-Ideas/Notes - I write a zillion random ideas down, and now they have a place to go!!!
-J Ferg - Any information/forms/receipts from Bryan's roofing job
-LISD - Information/forms from the school district Bryan works for
-Made By Katy- Anything to do with my blog or Etsy Shop!
-Parker - Random notes that I write, newsletters from children's ministry, doctor's notes, etc.
-Taxes - Well...tax stuff :)
-To-Do/Pay - Bills that need to be paid, forms that need to be filled out, etc.
-Utilities - Statements or letters from utility companies
-Weekly Ads - This is where I put my favorite grocery store ads that I get each week. I also put my Red Plum coupons (that I haven't clipped) and any specials from Babies R Us, Target, etc. I have a special place for clipped coupons that I hope to share soon, too. 


Y'ALL. This has changed my life. We've been using this system for about 3 months and we have yet to see any paper piled up on our kitchen counter. It truly is the little things that make the world a happy place! 


I cannot get over how easy my new mail sorting center is to use and maintain. I check the mail, immediately throw away the junk, and then quickly file the keepers into their categories. It takes all of one minute. If we get a newsletter at MOPS or church, it's not a big deal because it has a place to hang out! If Bryan comes home with a stack of player stats...it's not big deal, just file it away!

Coming up with adequate categories took a lot of thought and some tweaking, but was so worth it! Seriously. Everyone needs to do this, in my opinion :). 

Once the files get full enough, I will clean them out and transfer the long-term keepers to "The Big File Cabinet". I say "will" because I haven't had to do that yet--that's how tidy and organized this system keeps everything. 


Of course, I needed it to be functional AND pretty, so I threw a quick little vignette together. I should also mention that I keep my mail sorting center on the kitchen counter (the cabinets above it hold my "Command Center" - you will see that later). The kitchen still needs SO much work (like a total gut job), but I love looking at this particular little corner...it makes me smile.


How do you organize your mail and incoming papers? Does it ever drive your crazy like it did me?

Have a wonderful day!

Monday, August 26, 2013

Are You Ready For Some Fall?

Because I am!!

I know. It's still August. And yes, I know that it will pretty much be summer around these parts until mid November...but I've always loved fall. And so many good things come along with it... cute clothing (boots!), a slice of apple pie, crisp air, and Sunday afternoon naps with football games playing in the background...ah, I am a happy girl just thinking about it. And then, for those of you who are like me (which I think is anyone who reads this), there are the decorations!! Oh, how the decorations call to me. 

A week or so ago I unpacked all of our fall decor and took inventory. I always overspend during the holidays and am bound and determined not to this year. I've given myself a $50 budget for all decor (including pumpkins) and think I can stick to it. Bryan was pretty excited about my sudden urge to be frugal :).


This is what we have. It may not look like much, but since I like to mix seasonal decor in with my normal decor, it seems like plenty to me! Also, please ignore our very stark white bedroom :).

Last year I was a bit minimal with my decor, but I really liked what I ended up with. The year before that, there were ZERO fall decorations since I was newly pregnant, very sick, and usually asleep. And as much as a I love to decorate, I always have a hard time with seasonal decor, because everything MUST match in my book, but I don't decorate with reds or oranges...so obviously that kinda puts me in a bind. 

Thankfully though, I have learned that you don't have to use traditional colors to make your seasonal decorations look amazing. 


I am SO painting some pumpkins this year. I stocked up last year on faux pumpkins at clearance sales and am SET. All I need is a free naptime and some paint. Can't wait!

This year, since we've just moved into the new house and about 80% of it hasn't been touched as far as general decorations go, I will just be focusing on a few areas: Our front door, the dresser in our entry hall, our mantle, and our dining room.


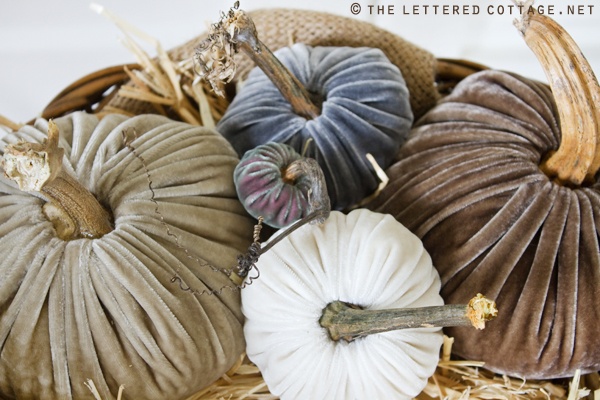
I would love to try my hand at these velvet pumpkins. I've found a few tutorials, but none that I'm totally in love with, so I may just make it up as I go along. 

Isn't this table set-up to die for? I love the apples surrounding the jars and the wheat. I saw wheat bundles at Hobby Lobby and am sorely tempted to go back and buy a few.


Oh, you're about to see a sprinkling of pictures from the blog, Dear Lillie. I mean, seriously, Jenny is so so SO amazing at seasonal decor. I could look at her blog for hours (and have many times).

I love these fresh cut leaves and antique hydrangeas. Well, I really love this whole table.


These are beautiful examples of how to style urns and vases.


Again with the leaves. The simplicity of this really gets to me. I love it!


I'm thinking that something similar to this pumpkin set-up will be happening on the front porch this year. And that peek of spanish moss? So very perfect.


The texture in this wreath is awesome, as is the homemade "thankful" tree.


So what are your plans for fall this year? Will you be going all out or just picking a few areas in your home to go crazy with? Where do you find the most inspiration?

Have an awesome day!


Friday, August 23, 2013

Organized Home: Gift Wrap / Scrapbooking Supplies

One of the first organizational projects I did in our new house dealt with finding a place for all of my gift wrap and scrapbooking supplies. I have A LOT of each and needed a dedicated system that would be easy to keep organized. 

I also didn't want to spend any money :).

SO, I decided to use some of those cheap-o plastic bins that you can find at Target or Wal-Mart (I already had a couple) and wrangle everything in one place. 


There are two shelves stacked on top of each other. I put these in the empty closet that is in my craft room. They fit perfectly!


The top is for all of my gift wrap. The labels I made (using scrapbooking paper and my label maker) are: 1) Tissue & Ribbon, 2) Gift Bags, and 3) Gift Boxes

I thought about putting tape and scissors in here, but I use those so often that they are on the shelves that I talked about last week. I also have them in my command center that I hope to show you soon!


In the gift box drawer I have a little bin (Dollar Spot at Target) that holds gift tags and labels. 


All of my rolls of wrapping paper are in a basket right outside the closet.


The lower shelf is all about scrapbooking! 


I cleaned out my scrapbooking supplies (I had waaaaaaay too much of it), and made these labels for the drawers: 1) Adhesives, Measure & Cut,  2) Embellishments, 3) Scrapbook Supplies, 4) Albums & Keepsakes


(I am just now noticing that I moved the adhesives bin to another drawer --oops!)

In my 'Embellishment' drawer, I have two bins (also from the Dollar Spot) with all of my stamps, ribbon, cardboard letters, fake flowers, and buttons. The plastic bags that everything is in are from my Paper Studio scrapbooking cart (I love that thing, but it is so hard to keep clean!)


The next drawer is general supplies...paper, punches, adhesives (there they are!), and stickers. The stickers and loose paper are in clear plastic holders from Hobby Lobby.


The bottom drawer consists of all of my unfinished albums and keepsakes that I want to put in the albums. The picture is kind of boring so I left it off :).

It's not much, but I cannot tell you how amazing it is to have a designated space for this stuff! My stress level is non-existent when I craft now. It is wonderful!

I also wanted to note that a few weeks after I had finished this project, I noticed one very similar to it on Pinterest...I thought it was so weird but I guess it's not that complicated of an idea (dang it!)...anyways, just wanted to let you know that I didn't intentionally copy :). 

--------------------------------------

Do you have a system to organize your gift wrap and/or scrapbooking supplies? I would love to hear about it!

Wednesday, August 21, 2013

Parker's Nursery Round Two (Progress)

Our first goal when moving into our new house was to get to have Parker's room completely, 100% finished by the end of our first week. Well...we kinda failed terribly at that, and Mr. Parker ended up sleeping in his pack n' play in my closet for about...3 weeks :). We finally got our act together and painted the walls and moved in all of the furniture so that Parker could at the very least sleep in his own bed. TWO MONTHS after that, I managed to paint all of the trim and doors (they were so yucky) and organized  all of his toys in his new toy closet. ANOTHER month after that and Bryan and I had spent an afternoon hanging everything on the walls and called it good. 

I found that the reason this room took us so long to finish (especially considering that it was the only room that we already had all of the furniture and decorations for), was because we usually do our house projects during naptime or after bedtime...which for obvious reasons, didn't work out so well in this case. :)

It was also really hard for me to decide whether or not to do the board and batten that I LOVED so much in our last house. (It was the last room I said goodbye to in our old house and I cried a lot...so many memories!) Ultimately, we chose not to do the board and batten for right now. We've actually been talking this past week and have decided that this room will definitely stay the nursery for all of our babies (it's the darkest and most quiet room), so we WILL do the board and batten, it's just a question of when. (Hopefully in the next month or two!)


SO.

I just wrote a lot of background info. Sorry about that novel, there. Here is what we started out with...


Yes. I know. It was their "theater room". There were outlets ev-ery-where. And lots of paint.
We still want to do something fun to the ceilings (in the way off future) and put in new carpet. (And of course the B&B)

It's also the darkest room in the house BY FAR, which is why the pictures are not the best quality--sorry :).

Here is what we have done with it (so far)...


His room is about one foot bigger all the way around. And he has a huge closet with room for all of his toys!


(I'm just noticing the water rings on the table. HA! Welcome to my real life.)


We didn't really change anything in here...as you can see!


I did change up the dresser vignette a bit with things we already had. (Isn't Mr. P so sweet in his one-year photo?? Love him.)


Oh, I guess we added that sunburst mirror (I realize it's kinda girly, but there were too many square things on the walls so I needed a different shape and couldn't find anything else around the house).


 The room set-up is a bit different than in the last house. The photo below is actually taken from inside one of the closet doors. The door to the room is the the right of the crib, opposite the window. There is a little walkway before it opens up to the room, which is very nice and gives us some extra space.


Also, please note our carbon monoxide detector. :) More real life for you! I meant to put Parker's newborn pictures in those frames above his crib but still haven't gotten around to it, haha.


That's it! I of course miss the board and batten and cannot WAIT to do that project, but I still love this room just the way it is right now!

And to answer any sourcing questions: (with links to what I could find online)

Crib: Craigslist, Rug: Lowe's, Rocker: Craiglist (Sealy brand), Ottoman: TJ Maxx, Dresser: Antique, Stacking baskets: TJ Maxx (I still see them from time to time), Side Table: TJ Maxx, Hanging Baskets: World Market (I believe they are discontinued...), Light Fixture: Ikea, Lamp: TJ Maxx, Airplanes: TJ Maxx, Curtains: Target, Bamboo Blinds: Lowe's, Sunburst Mirror: Hobby Lobby, Grapevine Balls: Hobby Lobby, Wire Baskets: Paul Michael, Wooden Frame: Target, Metal Wall Frames: Ross, Succulent: Ikea, Eucalyptus Bunch and Vase: TJ Maxx, Chair Fabric: Waverly Country Linen via Joann Fabrics, Crib Skirt & Pillow Fabric: Croscill Home via Joann Fabrics (discontinued, sorry!), Houndstooth Pillow Fabric: Croscill Home via Joann Fabrics, Blue Plaid Fabric on Pillow and Clothing Art: Robert Allen Home via Joann Fabrics (discontinued!), Paint Color: Valspar Cliveden Gray Morning, Satin (20% lighter in this room), Crib Color: Valspar Gray Silt, Satin, Ceiling Color: Valspar Antique White, Flat

Have a great day!

Monday, August 19, 2013

Inspiration for our Fireplace Makeover


Last week, I shared the progress that we've made on our mantle so far. I last left you with this:


The current look is SO much better than the 'Before', but we still have a lot that we want to do. I would really like to add more "oomph" to our mantle, along with a different brick color. The final touches will be the decorations, which I am pumped to play around with!


Here are some of my favorite images that have been inspiring our fireplace makeover.


Edie's fireplace is beautiful, and I love the touch of color she added. It's colonial and classic with a twist and the columns on either side of the firebox are perfection.


I LOVE this image. Those built-ins? Ahhh. Another classic, beautiful fireplace. I love the wainscoting above the mantle--this might happen to ours as well.


The hearth height in this image is just like ours, and again, I love the classic columns and wainscoting.


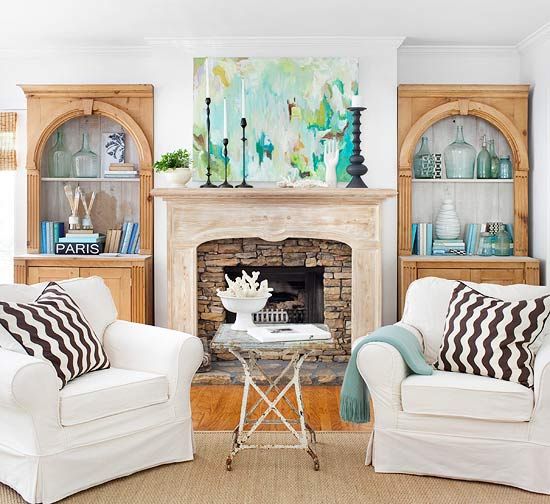
Another option we've been discussing is to make a mantle with distressed or reclaimed wood to add some depth and texture. I love the look of this driftwood mantle. This whole room is so whimsical and light--perfection!


Here is another great painted mantle with a twist on the classic look. I also really love the white painted brick, but I'm not positive I would love it on our fireplace. Thoughts?


Last but not least is this beautiful cottage-style mantle. I know that everyone is doing these wood planks, and with good reason--the look is truly beautiful and timeless! This would definitely add a lot of height and character to our living room if we went in this direction.

So what do you think? There are so many great looks with mantles, and it is SO hard to narrow it down to just one!

Have a wonderful day!

Friday, August 16, 2013

Lately...

Today I thought I would share a few of the things that I have been into "lately". Maybe this will become a series...but then again, I am a fickle blogger, so maybe not :).


This book, Scream-Free Marriage. This was actually not my choice, but our small group at church is doing a study on it. Bryan and I have both really enjoyed it so far! Definitely different from any marriage book I've ever read.


Parker's big boy room! We're still a year (at least) off from starting this project, but I cannot stop thinking about it. So fun! This is one of my favorite inspiration images.


Christmas, of course! I'm not really thinking much in the decor department this year (I'm too Type A and our house isn't "done" enough to go crazy with decorations), I'm really just excited that Parker is a bit more aware of what is going on. Hopefully we can do some fun little crafts and I'm sure he will love the train that goes around our tree. (The kid loves anything with wheels--such a boy.) I'm really wanting to do a felt tree too, like this one...


Skinny Taste is one of my favorite recipe sites. We've made this dish a lot this summer. I like to add sauteed zucchini to it too, yum!


I am semi-ashamed, but both me AND Bryan (yes, my manly husband) have been addicted to Gossip Girl on Netflix all summer. And we just got to the point where Jenny is done with the show. Thank GOODNESS. She was driving me crazy. XOXO.


Watching this little babe grow into a little boy. He is so fearless, and such a little ham. He loves to dance, swim, drive his cars, and be a little dare devil. Boys are so fun!


Besides the money that we are saving for our laundry room renovation, I've also been setting aside a little for an iPad cover because we still don't have one (and just cracked our iPad screen because of it.) I love all of the folio cases from Plum Street Prints

What's going on in your world these days? 

Have a wonderful weekend!